Entries in Videography (7)

Monday
Nov262012

Interview lighting in a hurry

When you're on a tight deadline and need to conduct several interviews quickly, the temptation is sometimes there to get rolling and pay very little attention to how your shooting looks. But if you have just five minutes to think you can often cut a few corners and still make your interviews look rather nice.

Here's how I do it:

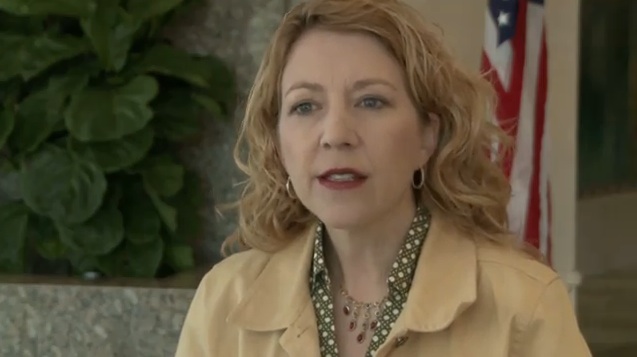
1) If lighting and weather allow, why not shoot your interviews outside? Finding a shady spot with a shady background will allow you to record an acceptable looking interview without the need to use a reflector or any lighting at all. If the sun is in the right place, you can use that natural night as spill for the background, or even to cast a warming glow onto your subject's face. I've tried to achieve both effects in the shot below.

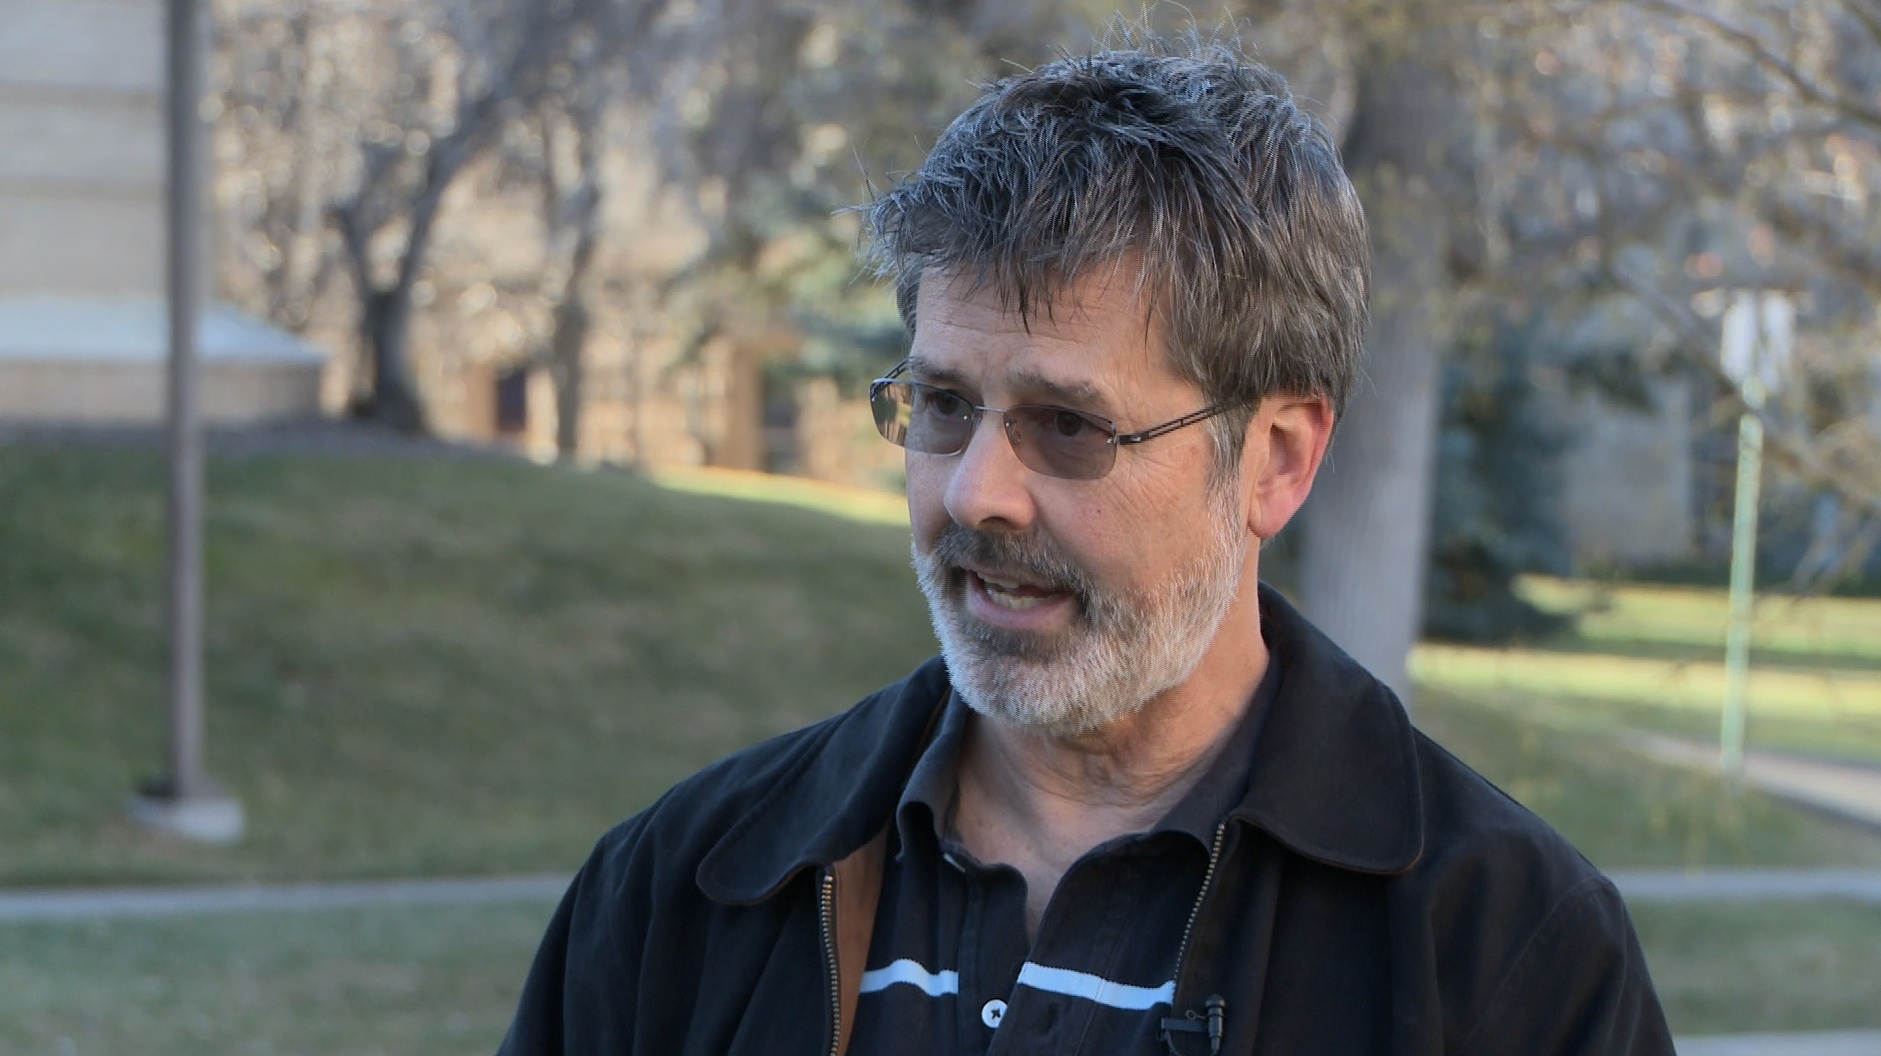
2) If you can't do your interview outdoors, or it doesn't make sense editorially, then you have several indoor options that will speed things up for you. Try to use natural light to your advantage.

If the layout of the room allows, face your interviewee straight on towards a window. You can often adjust the lighting using blinds, so long as they don't cast a shadow.

3) You can use natural light from windows to help you in other ways, for example, to cast some light onto the shoulder or hair. But most importantly, don't allow it to cause ugly shadows on your subject's face.

4) If you find you have no natural light to work with, try to use the ceiling or other lights already in the room. Lights that you can dim are particularly good for creating a nice looking background.

5) Overhead lights do not help you very much with lighting the face.


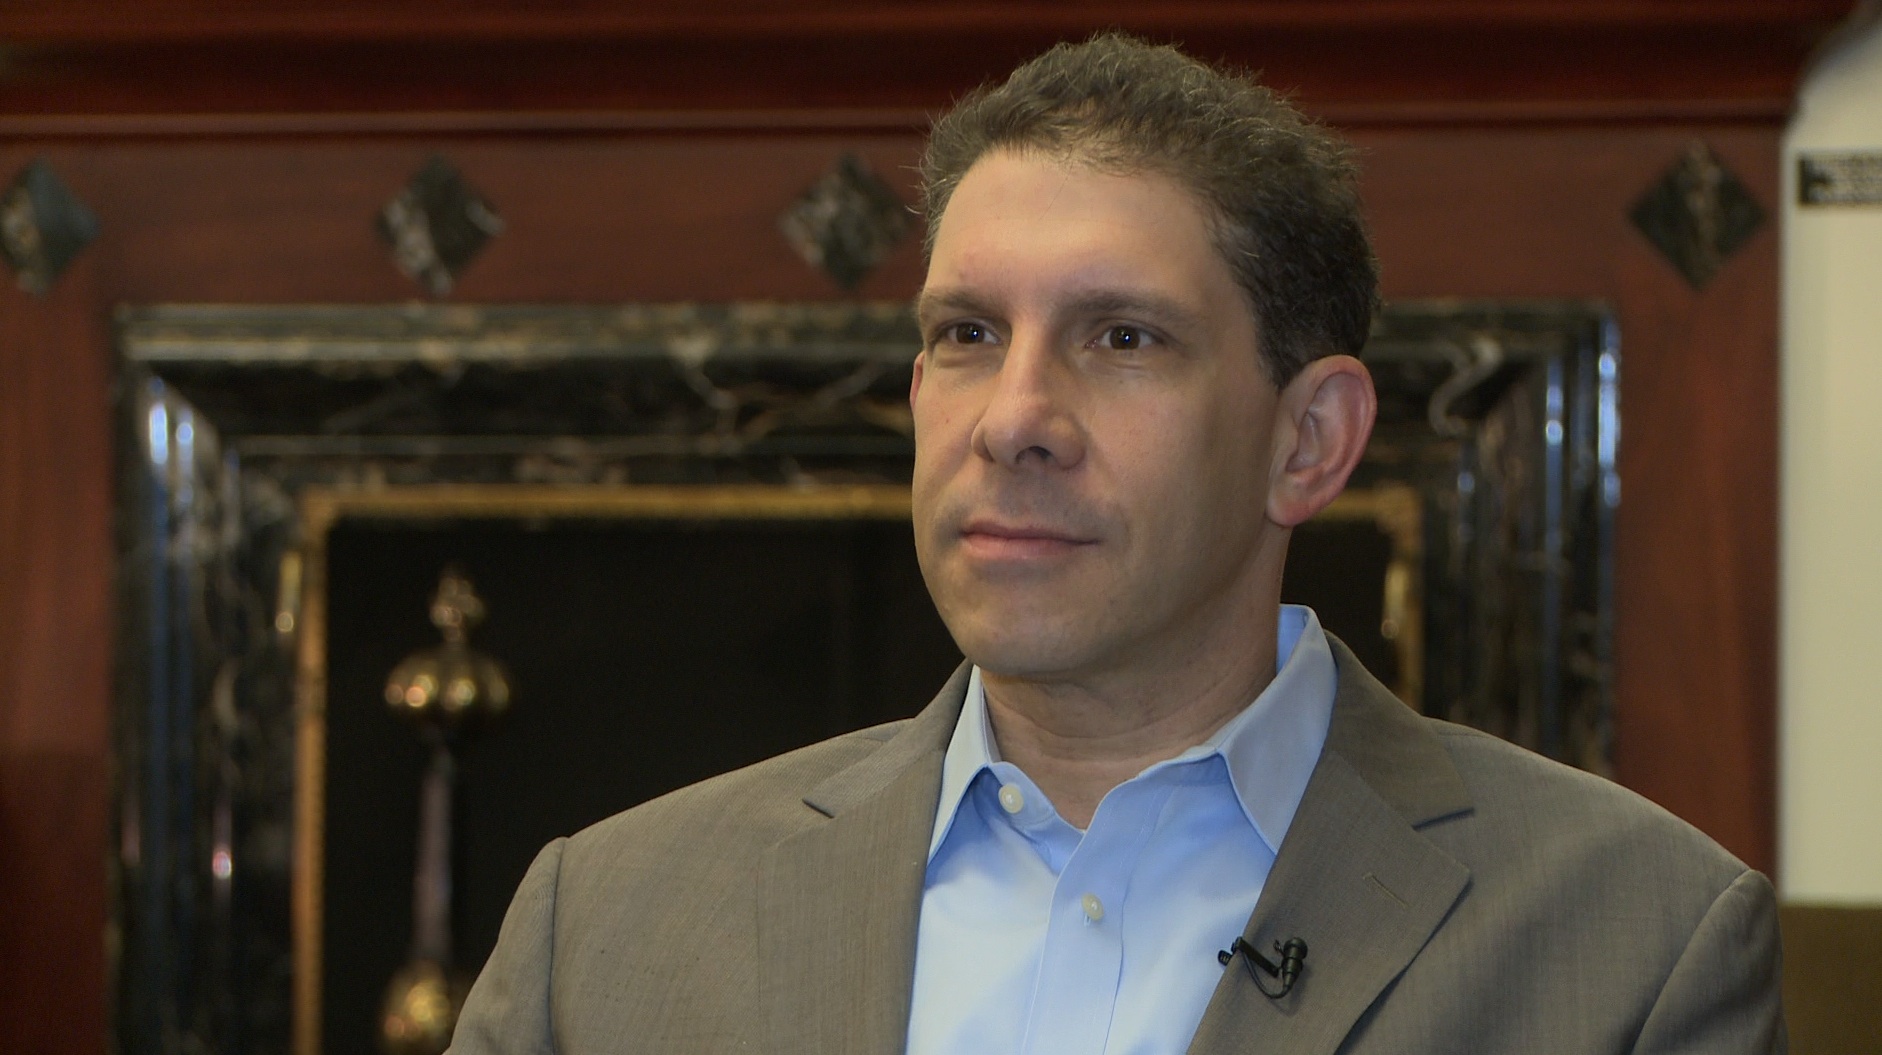
In the shot above, the only light I have used is a camera-top LED panel. I've used overheads to light the background, and a small spotlight to create the glint on the fireplace. All in all, it took about 10 minutes from arriving at the interview location to rolling.

When you're running and gunning you will often have very little time to perfect the lighting on an interview. And the examples I have given above are far from perfect, but the techniques I've tried to outline usually help me get a decent, broadcastable result.

Wednesday
Jun202012

Shooting news video with DSLRs

I've been interested for quite a while in how news shooters view the new generation of DSLR cameras with regards to their ability to capture video.

My interest was piqued again when I edited a recent feature for the PBS NewsHour which was predominantly shot with a new Canon DSLR camera. I have several observations based on that experience:

1) Ingestion time: The files from the camera took a long time to ingest into Final Cut Pro from a Firewire 800 drive using the Log and Transfer plug-in. I tried both unwrapping the raw MXF files, and getting the plug-in to convert to a more editing-friendly Apple ProRes format. Both methods took hours, and there was probably only two hours of footage.

2) Shallow DOF: The enormous size of DSLR sensors - along with the ability to use lenses of varying focal length - can create very narrow depth, and a cinematic look that many movie producers who shoot on video are fond of. But in a news environment where speed is often of the essence, and do-overs are usually not an option, movement often seems to result in objects coming in and out of focus. I find this distracting.

3) Picture texture: While I love the rich texture of the DSLR image, I'm not entirely sold on its appropriateness for news. This is especially the case when a story - such as the one I edited - involves footage from both a DSLR and a traditional pro camcorder - a Sony XDCAM EX3. Trying to match the images is impossible. And the difference when cutting from one format to the other just seemed too jarring to me.

4) White balance: I haven't shot video in a serious way on a DSLR myself, but in viewing the rushes it seemed to me that the colors often didn't appear accurate. They often seemed too red or too green. I'm not sure if this was user error, auto white balance, or just an inherent issue with DSLR cameras.

5) Audio: The sound on all the interviews using an external lavaliere microphone were over-modulated. I have heard from various shooters that audio remains a problem on DSLR cameras. Obviously, audio is of critical importance in television.

Having said all that, I am very interested in future developments in DSLR video cameras, particularly when manufacturers start to incorporate more functions of use in news gathering. There are a couple of really good blogs that are worth checking out if you are interested in the subject and want to keep up with DSLR video technology:

DSLR Video Shooter and Learning DSLR Video are great resources. While not tailored to news shooting, they are very authoritative on the issues and developments in DSLR video. For example, in the video below from Learning DSLR, author Dave Dugdale comprehensively compares two brands of DSLR.

As ever, I'm interested in what my readers think. Have you had success shooting news video with a DSLR. If so, let me know. And I'm keen to hear about the drawbacks too.

Wednesday
Aug032011

This election will be broadcast in HD

Reporters are constantly in the field these days gathering pictures of the various Republican candidates/potential candidates in the 2012 Presidential election.

Videojournalists are now called on to shoot HD footage of the main contenders on a regular basis, mainly for library purpouses, as primary season draws inexorably closer.

With more broadcasters than ever before requiring pictures in high-definition, the coverage of this general election will be one of the first I've shot almost entirely in HD.

Friday
Jun172011

Making the MOS-t of shooting vox-pops

Shooting M.O.S. (Man On the Street) is something you'll often have to do as a video journalist. M.O.S., sometimes called vox-pops from the Latin 'vox populi', is also one of the more difficult tasks when working solo. You'll often be working in a crowd and will need to be ready to get people's comments very quickly - negligible set-up time.

Here is a list of ten points I put together that I think are important to remember when shooting M.O.S. in the field:

1 - Use a tripod. M.O.S. shoots look really dreadful when you're trying to hold a camera in one hand and a mic in the other while looking the interviewee in the eye. 

2 - Because you are using a tripod, try to pick a location where you do not have to move around too much. Pick an area to shoot with plenty of foot traffic. It is best if you can get people to come to you, rather than having to carry your camera and tripod to a different spot each time.

3 - Select a significantly different backdrop for each M.O.S. It will look strange if the background is the same each time, but the person on camera is different. Remember, you will probably be editing these together into a sequence. You can often achieve a different backdrop just by swinging the camera around.

4 - Be mindful of the sun in the sky. Cloudy days tend to be easier… the light remains constant so the temperature of the shot doesn't fluctuate between interviewees in your M.O.S. sequence. Otherwise, try to pick an area of shade where the background isn't too bright either.

5 - Use a wireless lav microphone that you can pin on someone quickly. If you are trying to hold a microphone in front of the interviewee, it'll be very tough to ensure they remain in frame because you will need to be in front of the camera too. If you use a wireless lav, you can clip it on them and stand where you can see the viewfinder. You can also have the subject stand further away from the camera, allowing you to make more use of the full range of the lens, achieving more depth to the shot. In addition, make sure you hide the cable connecting the mic to the transmitter unit by either framing it out of the shot, or tucking it under clothing.

6 - Try to frame each person approximately the same. It doesn't matter if some are framed slightly tighter than others. But if you have a mix of super-wide and super-tight shots, it will look very disjointed when you edit them back-to-back. If you are shooting in a high enough definition format, it's possible to adjust the framing in post-production by cropping and zooming.

7 - Mix the direction that you have the interviewees looking - some camera-left, some camera-right. When you edit your footage together, you should alternate between left-looking and right-looking shots. This will help guard against jump cuts. You can also make use of functions such as Final Cut Pro's 'flop' tool to reverse shots if necessary. However, be very careful to take note of anything framed in the shot that would be inaccurate when flipped, such as writing. 

To help illustrate this point, here is an example of M.O.S. I gathered at the recent NBA Finals in Miami for AFP Television. The vox-pops are part of a sequence of shots sent out to AFP client broadcasters. This is my own upload with my own lower-thirds. If you wish to see additional footage from the shoot, you can do so here.

8 - Make sure you color balance your camera before you start shooting. If you shoot in auto-mode you may end up with soundbites with wildly varying color balances. This, of course, varies according to which camera you are using. Save yourself time in post-production by setting your camera values ahead of time. Setting picture profiles for cloudy or bright days can save time.

9 - Get the name of your subjects on tape. Use that to set audio levels. People have dramatically different tones of voice and speaking volumes. You don't want to boost your levels for a quiet speaker, then end up with distorted sound for the rest of your shoot.

10 - Never take your eyes off your camera. You're in a busy place. Never trust anyone you don't know around your gear - not even for a second.

Thursday
Jun092011

Video tutorial on shooting interviews

There aren't many good websites that take solo videographers through, step-by-step, the best ways to set up and film an interview.

Filming interviews while operating on your own is always a tricky proposition, particularly if you're looking to achieve depth and distance from the camera.

Dr Lisa Mills - Assistant Professor of Film at the University of Central Florida - has put together a series of video tutorials for students involved in a project to collect stories from military veterans.

Below is a grab from one of my recent interviews. I chose it because I filmed it in a hurry on a tight deadline. It illustrates that, with a few very simple steps, you can make your interviews look polished without very much pre-production. 

As Mills describes in her instructional videos, you need to chose somewhere with appropriate natural lighting, space to achieve depth, and a background that isn't boring but, at the same time, does not detract from the interviewee's words. 

Her pointers are basics for beginners, but certainly worth watching if you're new to the game.

Mills teaches documentary film-making at UCF. You can check out her YouTube channel here